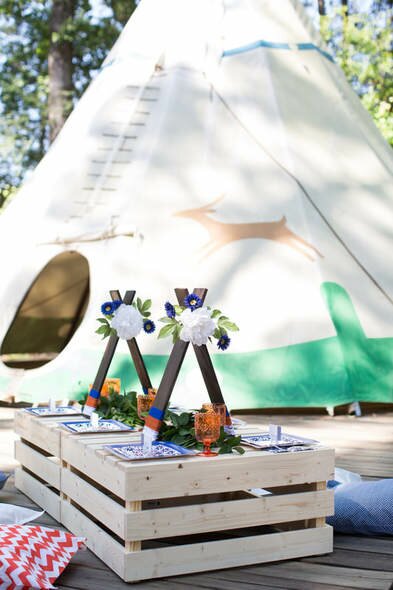
For the relaxed, whimsical bride who loves unique design elements and pops of bold color, bohemian chic is the perfect wedding shower theme! To translate this vibe, we put together a sunset, picnic styled fete for the bohemian bride, complete with DIY whimsical centerpieces.
Bohemian Wedding Shower Décor
This theme and the location inspired me to use bold tones as our base palette. Orange and blue are contrasting, yet complimentary colors; and they worked perfectly for our venue space. Our tabletop décor came together perfectly, layering modern Indigo floral paper plates from the Martha Stewart party supply collection, with simple navy blue rimmed square plates, Indigo floral paper napkins and silver plastic flatware.
I loved using these orange acrylic glasses as an additional pop of color on the tablescape. For a personal touch, we added placecards for each guest set atop fun David Tutera acrylic place card holders. To bring in freshness, we layered vibrant green eucalyptus sprigs as a table runner. And for the focal point of the table’s design, we added these fun DIY bohemian wooden centerpieces. Create your own using our simple tutorial below!
DIY Bohemian Wedding Shower Centerpiece
Materials Needed
● Wooden Teepee Organizer by Art Minds
● Yarn (Choose 3 coordinating colors; we chose blue, white and orange)
● Wood Stain
● Natural Bristle Paint Brush
● Cloth Rag
● Faux Flowers & Greenery (Choose 2-3 varietals; one focal floral stem and 2-3 supporting florals)
● Hot Glue Gun & Hot Glue Sticks
Directions
1. On a clean, protected work surface, use a natural bristle paintbrush to coat the wooden centerpiece base with your chosen stain color. A basic rule of thumb to consider when applying stain is to move quickly across each area, carefully wiping away any excess with a rag. Allow your stain to dry before moving on to the next steps.
2. Wrap the base of your centerpiece with one of your 3 chosen yarn colors to your desired height; we wrapped 9 layers of yarn for each color in the sample shown. To adhere the yarn’s ends to the wooden centerpiece, apply a small amount of hot glue then press and hold, being careful not to touch the glue while it’s hot with your hands or fingers.
3. Once the first yarn layer is adhered, continue the process with the other 2 colors; then repeat the process on the other side of the centerpiece’s base.
4. Next, layer greenery at the top of the wooden centerpiece, arranging in such a way that some sprays will be visible from either side of the primary flower focal point. Once you have selected your arrangement, apply hot glue to the flower steps, then hold down until it has dried, thereby attaching the flowers to the wooden centerpiece.
5. Now, layer your flowers. We added 3 blue flowers with different stem lengths to our arrangement, but any coloring would work.
6. Finally, attach your center flower on top of the other attached layers using hot glue; be sure to gently press to be sure it is securely attached. Our center flower was a stunning white peony spray.


 Razatrade says
October 28, 2018 at 10:24 pmNice and Beautiful decorations for Bridal Shower , Dining Plates, Table Decorations.